
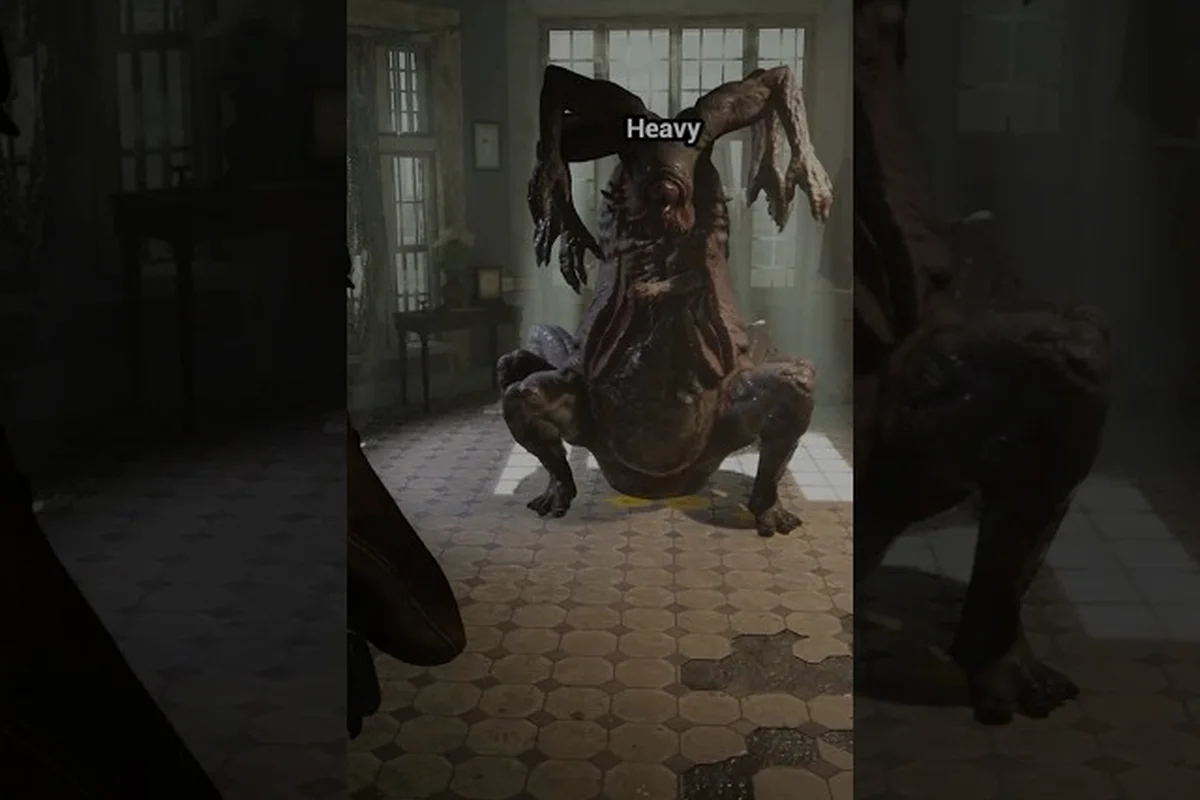
Flooded Arkham does not simply drown — it hunts. The Sinking City 2 enemies guide you are about to read breaks down every hostile creature confirmed for the launch build, from the shambling Slither to the amphibious Deep Ones and the reality-warping Shadows. Knowing which fights you can win and which you should run from is the difference between a productive investigation and a wasted trip back to a safe room. The official Steam page describes the core loop plainly: some fights must be met head-on, while others demand a retreat to rearm, retune your build, and return better prepared. That distinction shapes every encounter decision you will make, and this guide gives you the reference you need before the floodwaters rise.
The Sinking City 2 All Enemies: Core Threat Categories
Frogwares has confirmed three primary enemy families in the launch build, each with distinct behavior patterns, spawn conditions, and combat roles. Understanding how these categories overlap is essential because Arkham's districts rarely present a single threat type in isolation. The Arkham Fish Market area, for example, mixes Deep Ones surging from the water with Slither clusters that shamble through abandoned seafood stalls, creating layered encounters that punish tunnel vision.
The Slither are the most common enemy type, animated corpses that rise from flooded streets and collapsed buildings. They are slow but relentless, and they often appear in groups of three to five. Deep Ones are amphibious hybrids that emerge from dark water, and they are significantly faster and more aggressive than the Slither. Shadows are the rarest and most dangerous category — space-bending entities that distort perception and test your nerve more than your aim.
| Enemy Family | Primary Habitat | Aggression Level | Typical Group Size | Recommended Response |
|---|---|---|---|---|
| The Slither | Streets, buildings, flooded basements | Moderate | 3–5 | Fight with melee or handgun |
| Deep Ones | Waterways, docks, fish market | High | 2–4 | Fight with shotgun or retreat |
| Shadows | Dark interiors, fog banks | Extreme | 1–2 | Avoid or flee immediately |
The tactical takeaway is that The Slither serve as the game's baseline combat encounter, teaching you the dodge timing and stamina management that the other enemies will punish far more harshly. Deep Ones demand faster reactions, while Shadows require you to recognize when a fight is not worth the ammunition. According to the official Steam store page, the design intent is clear: not every encounter is meant to be won, and knowing when to disengage is a survival skill in its own right.
The Slither Guide: Anatomy and Combat Tactics
The Slither are the first enemy you will encounter in any new playthrough, and they establish the game's core combat rhythm. These reanimated corpses move with an unsettling, jerky gait that makes their attack timing harder to read than it first appears. While they are slow, their lunges cover surprising distance, and they can corner you in tight spaces if you are not paying attention to your surroundings.
The Slither Attack Patterns
Each Slither variant uses one of three basic attack patterns: a slow overhead swing, a quick claw swipe, and a grab that initiates a stamina-draining struggle. The overhead swing has a long wind-up but deals heavy damage, while the claw swipe is faster but weaker. The grab is the most dangerous because it locks you in place, leaving you vulnerable to other Slither in the group. Learning to recognize the wind-up animations is the key to dodging effectively, and the combat fundamentals guide covers the dodge timing in detail.
Weapon Efficiency Against The Slither
Melee weapons are surprisingly effective against the Slither because their attacks are slow enough to punish between swings. A heavy melee weapon can stagger them, opening a window for a follow-up strike. Firearms work well too, but ammunition is scarce in the early game, so relying on melee for Slither encounters conserves resources for tougher fights. The handgun is the best firearm choice because its precision allows you to land headshots that stagger the enemy, buying you time to reposition.
| Slither Variant | Health Tier | Weakness | Best Counter | Loot Drop Chance |
|---|---|---|---|---|
| Common Slither | Low | Melee stagger | Heavy melee | Low |
| Armored Slither | Medium | Headshots | Handgun | Medium |
| Bloated Slither | High | Fire damage | Shotgun | High |
Armored Slither appear later in the game and require a different approach because their bodies resist melee damage. Headshots with the handgun are the most efficient way to bring them down, though the shotgun works well if you can close the distance. Bloated Slither are the most dangerous variant because they explode on death, damaging anything in a small radius — including you. Always maintain distance when finishing one off, and use the environment to break line of sight if you need to reload.
Deep Ones Guide: Aquatic Ambushers and Water Tactics
Deep Ones are the second major enemy family, and they represent a significant escalation in threat level. These amphibious creatures are faster, stronger, and far more aggressive than the Slither, and they are intimately tied to the floodwater mechanics that define Arkham's shifting landscape. The extended gameplay trailer showcased at the Arkham Fish Market location demonstrates how Deep Ones surge from the water in coordinated groups, turning what looks like an abandoned marketplace into a kill zone within seconds.
Deep Ones Spawn Behavior
Deep Ones spawn almost exclusively near water, which means the docks, harbor district, and flooded residential areas are their primary hunting grounds. They can remain submerged and undetected until you are within striking distance, which makes them particularly dangerous when you are wading through deep water or navigating flooded interiors. The game's dynamic flood system means that areas you cleared earlier can become Deep One territory after the water level rises, so revisiting locations always carries risk.
Combat Strategy Against Deep Ones
The shotgun is the most effective weapon against Deep Ones because their amphibious bodies resist piercing damage but are vulnerable to close-range blunt force. Wait until they emerge from the water and commit to an attack, then punish them with a shotgun blast to the torso. The dodge-roll is your best defensive tool because Deep Ones telegraph their lunges with a distinctive hiss before striking. If you are outnumbered, retreat to higher ground — Deep Ones are slower on land than in water, and you can use that mobility advantage to break contact.
| Weapon Type | Damage Efficiency | Reload Risk | Recommended Range |
|---|---|---|---|
| Handgun | Moderate | Low | Medium |
| Shotgun | High | High | Close |
| SMG | Moderate | Medium | Close-to-medium |
The SMG is a viable alternative if you prefer sustained fire, but its ammunition consumption makes it inefficient for extended Deep One encounters. The shotgun's burst damage is better suited to the hit-and-run tactics that work best against these enemies. According to community reports from the demo build, Deep Ones also have a rage state that triggers when their health drops below 20%, increasing their attack speed and damage output — always finish them off quickly once you commit to the fight.
Shadows Enemy: When to Fight and When to Flee
Shadows are the most dangerous enemy type in The Sinking City 2, and they operate by completely different rules than the Slither or Deep Ones. These space-bending entities distort the environment around them, making it difficult to judge distances and attack timings. They are rare, but their presence signals a significant threat that demands your full attention. The Steam page describes them as creatures that "bend space and test nerves," which is an accurate summary of the disorienting experience of fighting one.
Shadow Behavior and Weaknesses
Shadows do not spawn in predictable locations like the Slither or Deep Ones. Instead, they appear in dark interiors, fog banks, and areas with heavy environmental distortion. They move in short, flickering bursts that make them difficult to track, and their attacks ignore conventional dodge timing because they can warp space to close distance instantly. The most reliable strategy is to avoid them entirely — Shadows are not tied to any mandatory progression objective, and the rewards for fighting them do not justify the ammunition cost.
When Fighting Is Unavoidable
There are situations where a Shadow blocks the only path forward, forcing a confrontation. In these cases, the shotgun with incendiary rounds is the most effective tool because the fire damage interrupts their space-warping ability. The flare gun is also useful for creating distance, though its ammunition is rare. If you find yourself fighting a Shadow, prioritize survival over damage — their attacks can drain your health bar in two hits, and the disorientation effect makes healing mid-fight extremely difficult.
| Shadow Encounter Type | Recommended Action | Resource Cost | Risk Level |
|---|---|---|---|
| Optional encounter | Flee immediately | None | Low |
| Path-blocking encounter | Fight with incendiary rounds | High | High |
| Boss-linked encounter | Fight with full loadout | Very high | Extreme |
The boss-linked Shadows are the most dangerous encounters in the game because they combine the Shadow's space-warping abilities with a larger health pool and more aggressive attack patterns. These fights require a fully upgraded weapon and a deep understanding of the dodge mechanics. The boss locations guide provides detailed spawn information for these encounters, so you can prepare before entering their territory.
Minimizing Encounters With Smart Routing
Knowing each enemy's strengths and weaknesses is only half the battle — you also need to plan your routes to minimize unnecessary encounters. Arkham's districts are densely populated with enemies, and the dynamic flood system means that your safe routes can become death traps after the water rises. The map guide covers the district layouts in detail, but this section focuses specifically on enemy-related route planning.
Route Planning Principles
The first principle of route planning is to avoid water whenever possible. Deep Ones dominate aquatic environments, and wading through flooded streets puts you at a significant disadvantage. Elevated routes, such as rooftops and the upper floors of buildings, are safer because they are inaccessible to Deep Ones and most Slither. The second principle is to carry the right weapon for the district you are entering. The fish market demands a shotgun for Deep Ones, while the residential districts are better suited to a handgun for Slither encounters.
Resource Management Between Encounters
Ammunition is the most precious resource in The Sinking City 2, and every enemy encounter consumes it. The melee-first approach is the most sustainable strategy because it preserves ammunition for emergencies. Carry a heavy melee weapon for Slither encounters, a shotgun for Deep Ones, and reserve your handgun ammunition for precision shots on armored targets. The weapons guide provides a detailed breakdown of each weapon's damage output and ammunition efficiency, which is essential for planning your loadout before entering enemy-dense areas.
| District | Primary Enemy | Recommended Loadout | Risk Assessment |
|---|---|---|---|
| Arkham Fish Market | Deep Ones | Shotgun + melee | High |
| Residential Districts | Slither | Handgun + heavy melee | Moderate |
| Harbor and Docks | Mixed | Shotgun + SMG | Very high |
| Hospital District | Slither + Shadows | Handgun + incendiary rounds | High |
The hospital district deserves special attention because it contains both Slither and Shadow encounters, making it one of the most dangerous areas in the early game. The combination of tight corridors and dark interiors creates ideal conditions for Shadow ambushes, and the Slither groups that patrol the hallways can corner you if you are not careful. Always enter this district with a full health kit and a clear escape route.
Advanced Enemy Tactics and Community Insights
The final section of this guide covers advanced tactics that go beyond the basics, drawing on community testing and player reports from the demo build. These strategies are not essential for survival, but they will help you conserve resources and complete investigations more efficiently.
Stagger Locking and Crowd Control
The stagger mechanic is the most powerful tool in your arsenal, and mastering it transforms difficult encounters into manageable ones. Every enemy in the game has a stagger threshold — a damage threshold that, when crossed, interrupts their attack and leaves them vulnerable. Heavy melee weapons are the most reliable stagger tools because their damage output crosses the threshold quickly. Against groups of Slither, focus your attacks on a single enemy to trigger the stagger, then use the brief window to reposition or finish off weakened enemies.
Environmental Advantages
The flooded streets of Arkham are not just obstacles — they are tactical tools. Explosive barrels are scattered throughout the districts, and luring enemies into their blast radius can clear entire groups with a single shot. Elevated positions provide a significant advantage against Deep Ones because they cannot climb, and you can pick them off with a handgun from relative safety. Narrow corridors work in your favor against Slither because they limit the number of enemies that can attack you simultaneously.
Community-Reported Enemy Behaviors
Players who spent significant time in the demo build have reported several enemy behaviors that are not immediately obvious. The Slither are attracted to noise, so firing a gun can draw additional enemies from adjacent rooms. Deep Ones have a limited range on land — if you can break line of sight and move more than 30 meters away, they will return to the water. Shadows are more active at night, and their spawn rate increases in areas with heavy fog. These behaviors are based on community testing and may vary by platform or version, but they provide a useful framework for planning your approach.
Frequently Asked Questions
What is the best weapon against The Slither in The Sinking City 2?
The heavy melee weapon is the most efficient choice because it staggers Slither reliably and conserves ammunition. If you prefer firearms, the handgun with headshots is the best option for armored variants. Always keep a melee weapon equipped as your primary tool for Slither encounters.
How do I avoid Deep Ones when exploring flooded areas?
Stay on rooftops and building interiors—Deep Ones surge from dark water and cannot climb, per the Arkham Fish Market trailer. When crossing flooded sections, move fast and keep a shotgun ready; rising floodwaters dynamically expand their territory, so pre-plan elevated escape routes before wading in.
Can I outrun Shadows in The Sinking City 2?
Yes, Shadows are fast but they have limited stamina. Sprinting in a straight line for 10–15 seconds will usually break contact. Use the environment to break line of sight, and do not stop to fight unless the Shadow blocks your only path forward.
Do enemies respawn after you clear an area?
Yes. Enemies respawn when you leave and re-enter a district, so cleared areas are never permanently safe. The dynamic flood system can also introduce new threats—like Deep Ones surging from newly submerged water—to previously cleared locations. Always re-approach familiar routes with caution, especially after the water level rises.
What is the rarest enemy type in The Sinking City 2?
Shadows are the rarest enemy type, appearing only in dark interiors and fog-heavy areas. They are not tied to mandatory progression, so most players will only encounter a handful during a full playthrough. Boss-linked Shadows are the rarest variant and require a fully upgraded loadout to defeat.