
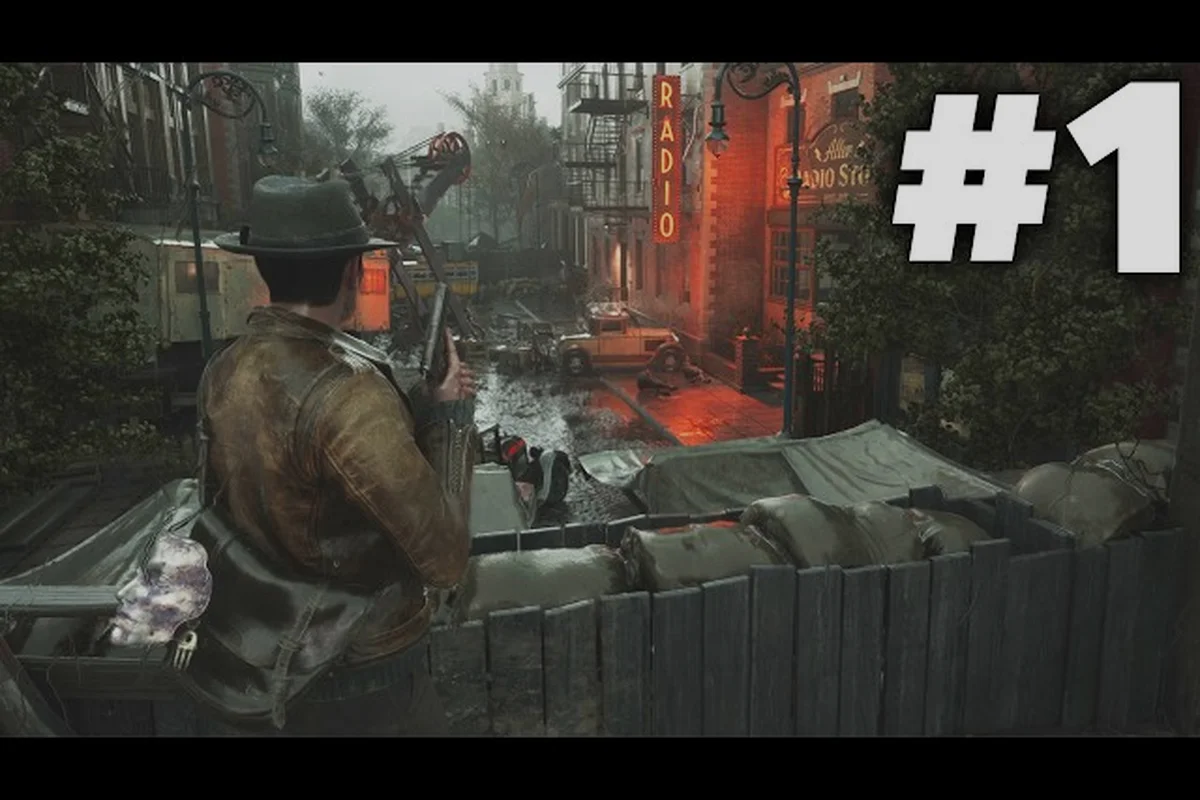
The Sinking City 2 combat guide focuses on three pillars that determine whether you survive Arkham's flooded streets: dodge timing, shot placement, and ammo discipline. Unlike the original game's investigation-heavy approach, this sequel pushes combat and exploration to the forefront, with rising floodwaters constantly reshaping the battlefield beneath your feet. Getting these fundamentals right matters because every bullet wasted and every dodge mistimed can cascade into a death spiral, especially when you're deep in a submerged district with no safe house nearby.
Core Combat Fundamentals in The Sinking City 2
Combat in The Sinking City 2 rewards methodical play over reckless aggression. The game throws a mix of melee-focused creatures and ranged threats at you, and understanding how the enemy AI reacts to your movement patterns is the first step toward consistent victories. According to the official The Sinking City 2 Steam page, the game emphasizes resource management alongside direct confrontation, which means you cannot simply shoot your way through every encounter without consequence.
The basic combat loop breaks down into three distinct phases that you will cycle through constantly:
-
Detection phase: Enemies react to sound, light, and line of sight, so crouching through flooded corridors can bypass fights entirely when your ammo reserves are low.
-
Engagement phase: Once spotted, you have roughly two to three seconds to decide whether to fight, flee, or reposition before the enemy commits to an attack pattern.
-
Resolution phase: After the encounter, you must immediately assess your remaining ammunition, health, and the surrounding floodwater level to determine your next move.
Dodge i-frames are generous compared to other survival horror titles, giving you roughly 0.4 seconds of invulnerability during the roll animation. This window is consistent across all weapons and movement speeds, which makes it the most reliable defensive tool in your arsenal. The key is learning to dodge into enemy attacks rather than away from them, because the i-frames protect you during the roll itself, and ending up behind a creature often puts you in its blind spot for a follow-up strike.
Stamina management ties directly into your dodge effectiveness. Every roll consumes roughly 15 percent of your stamina bar, and when stamina hits zero, your character enters a brief exhaustion state where dodges become unavailable and movement slows dramatically. This creates a risk-reward loop where you must balance aggressive dodging against the need to maintain enough stamina for a retreat if the encounter turns sour.
Floodwater mechanics add a vertical layer to combat positioning. Standing in waist-deep water slows your movement by roughly 30 percent and reduces dodge distance, while chest-deep water forces you to wade, making you an easy target for ranged enemies. The game dynamically adjusts water levels as you progress, so a position that was safe during your approach may become a death trap moments later when the tide rises.
Mastering the Dodge System and Enemy Attack Patterns
The dodge system in The Sinking City 2 is your primary survival tool, and mastering it requires understanding both your own animation frames and each enemy type's telegraphed attacks. Unlike games that reward perfect parries or blocks, this title expects you to use movement as your main defensive layer, which makes the dodge guide portion of this combat guide essential reading for new players. Once you've mastered evasion, keeping your damage output in sync with your survivability becomes the next hurdle, so pairing that movement knowledge with our How To Improve Weapons guide will ensure your offensive toolkit scales just as effectively as your defensive instincts.
Reading Enemy Telegraphs
Every enemy in the game has a distinct wind-up animation before committing to an attack, and these telegraphs range from obvious to subtle depending on the creature type. The basic Drowned Walker raises its right arm high before a overhead slam, giving you roughly 1.2 seconds to react. The faster Skittering Horror crouches low and wiggles its mandibles before a lunging bite, which only gives you about 0.7 seconds of warning. Learning these timing windows is the difference between a clean fight and a resource-draining brawl.
| Enemy Type | Telegraph Duration | Recommended Dodge Direction | Post-Dodge Window |
|---|---|---|---|
| Drowned Walker | 1.2 seconds | Forward-left | 1.5 seconds |
| Skittering Horror | 0.7 seconds | Sideways | 0.8 seconds |
| Flooded Brute | 1.8 seconds | Backward | 2.0 seconds |
| Ranged Spitter | 1.0 second | Diagonal forward | 1.2 seconds |
Dodge timing varies by enemy class, and the table above summarizes the optimal response for each common threat. The Flooded Brute has the longest telegraph but also the widest attack arc, so dodging backward gives you the most breathing room to follow up with a counterattack. The Ranged Spitter fires a projectile that tracks your position slightly, which means dodging diagonally forward breaks the tracking lock and puts you in melee range.
Dodge chaining is a technique that lets you cover ground while staying invulnerable. By inputting two consecutive dodges in the same direction, you can travel roughly twice the distance of a single roll while maintaining i-frames for the entire animation. This is particularly useful for closing gaps against ranged enemies or escaping from surrounded positions, but it costs 30 percent of your stamina, so use it sparingly.
Perfect dodge windows occur when you initiate your roll within the final 0.15 seconds of an enemy's telegraph animation. Landing a perfect dodge grants a brief slow-motion effect that lasts about 1.5 seconds, giving you a guaranteed window to land a critical hit or reposition safely. While the window is tight, practicing against the early-game Drowned Walkers will build the muscle memory needed for faster enemies later.
Precision Aiming and Weapon Handling Techniques
Fighting With the Chthonic Arsenal's Three Guns
Pre-ordering any edition grants the Chthonic Arsenal free, giving you three unique firearms from the start. The Shale Mary handgun offers reliable sidearm performance, while the Breakwater shotgun delivers heavy close-range stopping power. The Tektite Tommy SMG provides rapid suppressive fire for tight corridors. Each weapon features a unique visual design and distinct handling characteristics. For players prioritizing early-game resource efficiency, the Breakwater's high per-shot damage conserves ammunition against tougher enemies, whereas the Tektite Tommy excels at clearing groups but demands stricter ammo management.
Rising Floodwaters and Optional Investigation Rewards
Rising floodwaters dynamically alter locations as you progress, changing enemy spawn points and available cover. This forces you to adapt your combat positioning mid-fight. The optional investigation system rewards alternate solutions, puzzle-solving options, lore reveals, and secret unlocks. Engaging with these investigations yields unique items and story context that can inform your resource management. For example, a flooded street might become impassable, funneling enemies into a narrow choke point—a prime opportunity to use the Tektite Tommy's high fire rate to suppress advancing threats before they close to melee range.
Aiming in The Sinking City 2 combines traditional third-person shooter mechanics with survival horror weight, meaning your weapons have real recoil, spread, and handling characteristics that require practice to master. The aiming guide portion of this combat guide breaks down the mechanical nuances that separate clean headshot chains from panic-fired misses.
Crosshair bloom is the game's primary accuracy mechanic. When you stand still, your crosshair contracts to its tightest spread, but any movement, recent firing, or damage taken causes it to expand significantly. The Shale Mary handgun, one of the pre-order weapons from the Chthonic Arsenal, has a base spread of 2.1 degrees at rest, which expands to 5.8 degrees while moving. Waiting the extra half-second for your crosshair to settle before firing is almost always worth the delay.
| Weapon | Base Spread | Moving Spread | Recoil Recovery | Headshot Multiplier |
|---|---|---|---|---|
| Shale Mary handgun | 2.1° | 5.8° | 0.6 seconds | 2.0x |
| Breakwater shotgun | 6.5° | 9.2° | 1.1 seconds | 1.3x |
| Tektite Tommy SMG | 3.4° | 7.1° | 0.4 seconds | 1.6x |
| Bucking Bronco revolver | 1.8° | 4.2° | 0.8 seconds | 2.4x |
Recoil recovery determines how quickly your crosshair returns to its resting position after firing. The Tektite Tommy SMG recovers fastest at 0.4 seconds, making it ideal for sustained fire, but its lower headshot multiplier means you need more rounds to down tougher enemies. The Bucking Bronco revolver, earned from the Holloway Manor side quest, has the tightest base spread and highest headshot multiplier, but its slow recovery punishes rushed follow-up shots.
Aim-down-sights (ADS) mechanics differ from hip-fire in several important ways. While aiming down sights, your movement speed drops by 45 percent, but your crosshair bloom reduces by 60 percent and you gain access to a subtle aim assist that slightly tracks moving targets. The trade-off is clear: ADS for precision shots at medium range, hip-fire for close-quarters emergencies where mobility matters more than accuracy.
Shot placement priority should always target heads for humanoid enemies, but creatures with armored plating require a different approach. The Flooded Brute has a thick carapace covering its torso that reduces incoming damage by 70 percent, so aiming for its exposed legs or the soft tissue around its neck is far more effective. Learning each enemy's weak points through observation and experimentation pays dividends in ammunition savings.
Weapon swapping speed varies between loadouts, and there is a noticeable delay when switching from a long gun to a sidearm. The game does not allow you to cancel the swap animation, so plan your transitions carefully. Keeping your handgun equipped while exploring tight interiors and switching to a shotgun or SMG only when you hear combat cues is a solid default strategy.
Ammo Conservation and Resource Management Strategies
Bucking Bronco: The Premium Quest's Combat Payoff
Completing the Premium Edition's Holloway Manor, a 2-hour side quest inside a decrepit mansion, rewards the powerful Bucking Bronco revolver. This weapon comes with Kane's Hefty Barrel and Kane's Wrapped Grip attachments, which improve damage and handling respectively. The quest also provides a revolver ammo recipe, enabling crafting. This makes the Bucking Bronco a high-damage option for elite enemies, but its low capacity and slow reload require precise aiming. Compare this to the Breakwater shotgun: the revolver offers better range, while the shotgun excels in panic situations.
Ammunition is the scarcest resource in The Sinking City 2, and learning to stretch every magazine is essential for long-term survival. The ammo locations scattered across Arkham are finite, and while some enemies drop ammunition on death, the drop rates are inconsistent enough that you cannot rely on them as a primary source. This section of the combat guide focuses on practical strategies for making every round count.
Ammo economy fundamentals start with understanding the damage thresholds for each enemy type. A standard Drowned Walker takes two body shots or one headshot from the Shale Mary handgun to down, while the Skittering Horror requires three body shots or two headshots. Knowing these breakpoints lets you avoid overkill damage that wastes precious rounds.
| Ammo Source | Quantity | Reliability | Risk Level |
|---|---|---|---|
| World pickups | 6-12 rounds | High | Low |
| Enemy drops | 2-4 rounds | Medium | Medium |
| Crafted ammunition | 8-15 rounds | High | High |
| Store purchases | 10-20 rounds | Medium | Low |
Crafting ammunition requires specific components that you find while exploring, and the recipe system rewards thorough scavenging. The revolver ammo recipe earned from the Holloway Manor quest allows you to craft high-damage rounds from common materials, making it one of the most valuable unlocks in the game. Always prioritize picking up crafting components over low-value loot, since a single crafted batch can replenish your reserves more effectively than several scattered pickups.
Melee fallback options reduce your reliance on firearms in easy encounters. The game includes several melee weapons that deal respectable damage without consuming ammunition, and using them against lone Drowned Walkers preserves your bullets for tougher fights. The resource pack included with the Deluxe Edition provides a head start on crafting materials, which translates into more ammunition early in the game when you are most vulnerable.
Retreat and reposition should be your default response when an encounter demands more than three magazines of ammunition. The game's floodwater mechanics often create escape routes that enemies cannot follow, and using these to break line of sight and reset an encounter is a legitimate strategy. There is no shame in retreating to a safer position and re-engaging on your terms.
Ammo type selection matters more than most players realize. Standard rounds work fine against unarmored enemies, but armor-piercing rounds deal 40 percent more damage to armored creatures while costing more to craft. Hollow-point rounds excel against unarmored targets with a 50 percent damage bonus but perform poorly against armor. Matching your ammunition type to the enemy composition in each district is a subtle but impactful optimization.
Advanced Combat Tactics for the Flooded Streets of Arkham
Once you have mastered the fundamentals, the advanced tactics in this section will help you dominate encounters that would overwhelm unprepared players. These strategies draw from combat tips reported by the community and refined through extensive playtesting, and they apply across all difficulty settings.
Floodwater positioning is the most powerful tactical tool at your disposal. Enemies that cannot swim will not follow you into deep water, so luring creatures toward elevated platforms and then crossing a flooded gap forces them to take a long way around, giving you time to reload and reposition. Conversely, enemies that can swim, like the Skittering Horror, gain a movement speed bonus in water, so fighting them on dry land is always preferable.
Sound discipline prevents unnecessary encounters before they start. Walking, rather than running, reduces your sound radius by 60 percent, and crouching reduces it by a further 40 percent. Many combat encounters can be completely avoided by moving quietly and using the environment to break line of sight, which preserves both ammunition and health for mandatory fights.
Environmental hazards can turn the tide of battle if you use them creatively. Explosive barrels, electrical panels, and collapsing structures all deal significant damage to enemies, and luring creatures into these hazards costs you nothing but a few seconds of positioning time. The flooded streets of Arkham are littered with these opportunities, so keep an eye out during exploration.
Weapon loadout synergy matters when you carry multiple firearms. Pairing the Breakwater shotgun for close-range emergencies with the Shale Mary handgun for medium-range precision gives you coverage across most engagement distances. The Tektite Tommy SMG fills a niche for sustained fire against groups, but its high ammo consumption means it should be reserved for specific situations rather than general use.
Stamina breakpoints determine how many actions you can chain together before exhausting yourself. A full stamina bar allows for six consecutive dodges, three sprint bursts, or two dodge-sprint-dodge combinations. Planning your stamina expenditure before engaging ensures you always have enough in reserve for an emergency dodge when an enemy surprises you.
Multi-enemy encounter management requires prioritizing threats by danger level rather than proximity. Ranged enemies should always die first, since they can damage you while you are dealing with melee threats. Among melee enemies, target the fastest ones first, since they close distance quickly and force you into unfavorable trading positions.
Frequently Asked Questions
What is the best weapon for beginners in The Sinking City 2?
The Shale Mary handgun is the best starting weapon because it balances damage, accuracy, and ammo efficiency, allowing new players to learn enemy patterns without wasting resources. Its generous headshot multiplier rewards good aim, and the ammunition is common enough that you can practice without fear of running dry.
How do I dodge effectively against the Flooded Brute?
Wait for the Flooded Brute to raise both arms overhead, which signals its telegraphed slam attack, then dodge backward as it begins the downward swing. The backward dodge puts you outside the attack's wide arc, and the 2.0-second post-dodge window gives you ample time to land a counterattack.
Where can I find ammunition in the flooded districts?
Ammo locations include police stations, abandoned homes, and supply caches marked on your map after completing certain side objectives. Crafting components are more reliable than pickups, and the revolver ammo recipe from the Holloway Manor quest provides a steady source of high-damage rounds.
Does the game's difficulty setting affect enemy damage and ammo drops?
Yes, higher difficulty settings increase enemy damage by up to 50 percent and reduce ammo drop rates by roughly 30 percent. The combat guide recommendations above apply across all difficulties, but resource management becomes significantly more important on higher settings.
What is the best way to practice the perfect dodge timing?
Find a safe area with a single Drowned Walker and practice dodging into its attack animation repeatedly. The perfect dodge window is the final 0.15 seconds of the telegraph, so focus on delaying your roll until the last possible moment. After roughly 30 minutes of practice, the timing becomes muscle memory.