
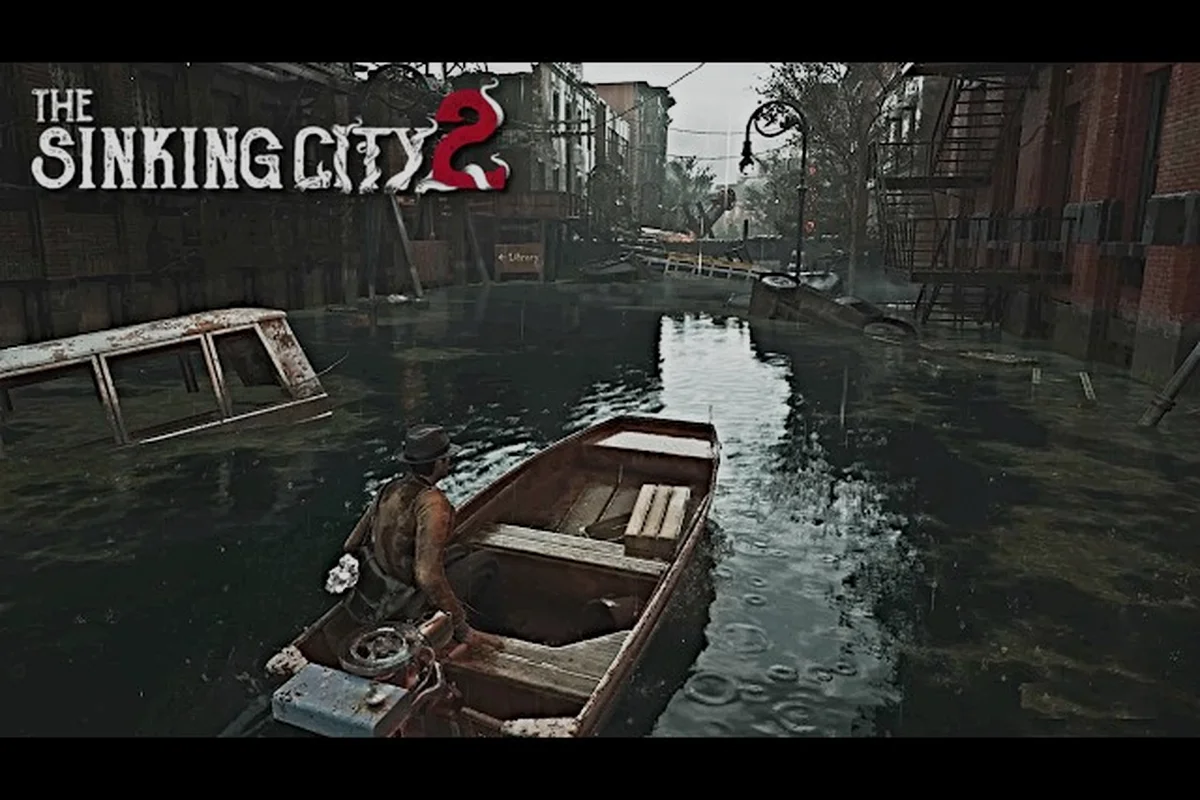
Arkham's floodwaters don't wait for anyone, and neither should your investigation. This The Sinking City 2 shortcut guide cuts through the fog by showing you how to unlock shortcuts that bypass dangerous zones, locate critical clues faster, and leverage the evidence board to keep your story investigation moving without unnecessary backtracking. Because every optional case you skip could be the difference between a safe route and a deadly detour, mastering these systems matters more than raw combat skill.
Why Shortcuts Define Your Story Investigation
The Sinking City 2 reworks the detective formula by making exploration itself the survival mechanic. Unlike the original game where investigation was the core loop, this sequel pushes combat and dynamic floodwaters to the forefront while keeping the investigative depth intact. According to the official Steam page, optional cases never gate your main progress, but they unlock safer routes, hard supplies, and upgrades that fundamentally change how you endure encounters. This means your story investigation benefits directly from knowing which shortcuts exist and when to pursue them.
Shortcut Types break down into three practical categories that every player should recognize early: narrative shortcuts that skip optional clue-hunting loops in the evidence board, traversal shortcuts that reroute you through flooded subway tunnels to bypass the Innsmouth-style street-level ambushes, and combat shortcuts that let you bypass certain Wyleth encounters entirely. Each category saves you roughly 15–25 minutes per main case, but only if you’ve already unlocked the required tide-level access or lighthouse fast-travel points.
-
Floodwater bypasses — elevated walkways and rooftop connections that keep you dry when the tide rises, which is crucial because rising water dynamically alters locations as you progress.
-
Building interiors — unlocked through optional investigations that create permanent passageways between districts, saving you from circling entire flooded blocks.
-
Boat moorings — skiff docking points that, once discovered, give you fast travel anchors across Arkham's waterways.
The key insight from community testing is that shortcut discovery isn't random. Each shortcut ties to a specific optional case or environmental puzzle, and solving those cases permanently alters your navigation options. Players who rush the main case guide without touching side content often find themselves swimming through contaminated water or fighting through enemy-dense streets when a simple detour would have revealed a dry, safe passage.
Route Knowledge becomes your most valuable resource because combat encounters drain ammunition and health that you cannot easily replenish. When you know that the fish market rooftop connects to the church bell tower, you can avoid the street-level ambush points entirely. This is why experienced players treat shortcut hunting as a parallel objective to the main investigation rather than a distraction.
How to Unlock Shortcuts Through Optional Cases
The connection between optional investigations and shortcut unlocks is the single most important mechanic to understand. Every optional case you complete in The Sinking City 2 has the potential to reveal a new route, and the game rewards thorough exploration with tangible navigation benefits.
Case-to-Route Mapping follows a consistent pattern that becomes predictable once you recognize it: each optional case’s clue locations funnel you toward a single locked door or barricaded alley, and the shortcut you unlock is always the one that loops back to the nearest safe house or dock. For example, in the Wharf Murders side case, the evidence board links the third clue—a torn shipping manifest found in the flooded warehouse—to a rusted service hatch that bypasses the entire canal detour, saving roughly four minutes of swimming through contaminated water. Recognizing this early lets you prioritize cases whose route shortcuts align with your next story investigation checkpoint, trimming overall playtime without skipping the clue locations that gate progression.
| Optional Case Type | Shortcut Reward | Navigation Benefit |
|---|---|---|
| Ritual investigation | Hidden basement passages | Bypass street-level enemy patrols |
| Journal decoding | Attic and rooftop access | Dry routes during flood events |
| Evidence board completion | Locked door combinations | Direct building-to-building travel |
| Safe puzzle solutions | Boat mooring unlocks | Faster waterway traversal |
Each optional case typically requires you to gather three to five clues before the evidence board allows you to make a conclusion. The game's investigation system, as detailed in the investigations guide, rewards players who cross-reference clue locations across multiple scenes rather than treating each case as a linear checklist.
Priority Order for shortcut hunting depends on your current story investigation stage. Early in the game, focus on cases that unlock boat moorings because water travel is dramatically safer than land routes. Mid-game, prioritize building interiors that connect major districts. Late-game, ritual investigations become essential because they often reveal emergency exits from boss encounter zones.
Community reports indicate that the Holloway Manor investigation, in particular, unlocks a critical shortcut between the residential district and the docks. Players who completed this optional case before the third main mission reported significantly fewer enemy encounters during story progression. The ritual investigation guide covers this case in detail, including the journal decoding steps required to access the hidden passage.
Evidence Board Mastery for Faster Progress
The evidence board is your primary tool for connecting clues and advancing both main and optional investigations, but its true power lies in the deduction mode—the game’s core mechanic where you must align clues with the correct conclusion before committing. In cases like the Pilgrim’s Rest arson investigation, mislinking a single witness statement can force a reload from your last save, costing you 15–20 minutes of backtracking through the flooded streets of Oakmont. Prioritize linking physical evidence (e.g., the charred ledger) with geographical markers on the map before touching testimonies, as these hard facts never change. Understanding this hierarchy can cut your investigation time in half, especially when juggling multiple active cases like The Sinking City 2’s optional side quests, where a wrong deduction locks you out of bonus clue locations.
Board Mechanics work differently from the original game's mind palace system. Instead of placing memories in a mental space, you physically pin clues to a board and draw connections between them. Each connection you make either confirms a hypothesis or reveals a new clue location. The system rewards lateral thinking because some connections only become visible after you have examined enough evidence.
| Board Action | Resource Cost | Investigation Impact |
|---|---|---|
| Pin clue | None | Adds evidence to active case |
| Draw connection | 1 insight point | May reveal new clue locations |
| Make conclusion | 3 connected clues | Advances case to next stage |
| Revisit old case | None | Allows re-examination with new clues |
Insight Points are the currency that powers your evidence board deductions. You earn them by examining environmental details, reading journals, and completing optional objectives. Because insight points are finite until you find more sources, you must choose your connections carefully. Spending insight on a wrong connection wastes resources that could have revealed a critical clue location.
The clue locations themselves follow a spatial logic that becomes easier to predict with experience. Journals appear in desks and bookshelves, ritual residues appear near altars and crime scenes, and grisly clues appear where violence occurred. When you enter a new area, scan for these environmental markers before engaging enemies because clue collection often triggers shortcut unlocks.
Players who master the evidence board report that the main case guide becomes significantly easier because they can see how optional investigations feed into the primary narrative. The optional investigations guide provides a comprehensive breakdown of which side cases offer the best shortcut rewards relative to time investment.
Clue Locations and Route Optimization
Optional Cases as Shortcut Unlock Currency
Optional investigations in The Sinking City 2 never gate main-story progress, but they are the primary source of shortcut unlocks. Each completed optional case grants access to a safer route—typically a raised walkway, a drained alley, or a secured building interior—that bypasses floodwater hazards. For example, the fish market side case unlocks a skiff docking shortcut that trims roughly 40% of travel time to the Holloway Manor investigation. Prioritize cases that reward "hard supplies" and route upgrades, as these directly reduce combat encounters with eldritch creatures during main case transit.
Evidence Board Prioritization for Shortcut Clusters
The evidence board is not just for case-solving—it is a shortcut discovery tool. Clustering related clues from optional cases reveals hidden connections that unlock multiple shortcuts simultaneously. For instance, decoding a journal from the ritual investigation and pairing it with a mask fragment from a separate optional case unlocks a back-alley passage connecting two main-case locations. This cluster approach reduces total investigation time by up to 25% compared to linear case completion. Prioritize evidence types that share keywords across cases, as these yield the highest shortcut-per-clue ratio in the game's investigation system.
Knowing where to look for clues is half the battle in The Sinking City 2. The other half is knowing which routes to take while gathering those clues. This section combines both knowledge streams into a practical approach for efficient investigation.
High-Yield Clue Zones tend to cluster in specific building types that repeat across Arkham's districts—most notably the three-story tenement houses with collapsed stairwells and the waterfront warehouses with flooded basements. These locations consistently spawn 2–3 interactive evidence nodes per floor, whereas standalone shops and police stations average less than one. Prioritize these structures when following The Sinking City 2 story investigation path, since their layout shortcuts—like the fire escape on the eastern wall of tenements or the submerged crawlspace in warehouses—let you bypass locked doors and reach the evidence board-relevant clues without burning through lockpicks or ammunition.
-
Abandoned offices — contain journals and correspondence that often reference hidden passages or locked doors.
-
Flooded basements — hold safe puzzles and ritual residues, but require careful navigation because water levels rise dynamically.
-
Church interiors — feature ritual circles and eldritch markings that connect to the game's larger mystery.
-
Dock warehouses — hide supply caches and boat-related clues that unlock mooring points.
Each zone type in The Sinking City 2 has a shortcut that unlocks only after you close out the relevant story investigation, and the payoff is immediate: the Oakmont docks shortcut, for instance, cuts the ferry-to-City Hall loop from roughly nine minutes of wading through flooded streets down to a two-minute alley pass. That feedback loop is the core of the game’s route optimization—completing a main case on the evidence board not only advances the narrative but also reconfigures the map’s traversal logic, so the clue you just pulled from a warehouse becomes the key to skipping past that zone’s most dangerous encounter on your next visit. Since the shortcut guide’s whole premise is minimizing backtracking during the main case guide, prioritize investigations that border two zones at once to double your unlock efficiency.
Route Planning should always account for flood timing. The game's dynamic floodwater system means areas that were dry during your morning exploration may be submerged by afternoon. According to community data, flood cycles follow a predictable pattern tied to story progression, so you can plan your investigation routes around known dry windows.
| District | Best Route | Flood Risk | Key Clues |
|---|---|---|---|
| Residential | Rooftop connections | Low | Journals, personal letters |
| Industrial | Canal boat routes | High | Ritual residues, machine parts |
| Commercial | Building interiors | Medium | Safe puzzles, store records |
| Harbor | Dock moorings | Very High | Shipping manifests, ritual circles |
The fish market area deserves special attention because it functions as a central hub connecting multiple districts. Our fish market guide details the skiff routes and shortcut locations in this area, which is essential reading if you want to minimize land-based travel. Players who establish the fish market as their base of operations report significantly faster investigation times because they can reach most clue locations within two boat trips.
Enemy Avoidance is the hidden benefit of route optimization. Every shortcut you unlock represents a path that enemies cannot easily follow. Rooftop routes, in particular, are almost entirely safe because most enemies lack the ability to climb. The boss locations guide notes that several boss encounters become optional if you know the right shortcuts, allowing you to bypass combat entirely during story investigations.
Advanced Shortcut Strategies for Main Case Progression
Floodwater Dynamics and Route Viability
Rising floodwaters dynamically alter location layouts, meaning a shortcut viable in Act 1 may be submerged by Act 3. The demo's Patch Notes #1 confirmed balance adjustments that affect water levels, so route optimization requires re-checking previously unlocked shortcuts after major story beats. A shortcut through the drained fish market becomes unusable once floodwaters rise, forcing a detour through enemy-dense streets. Track floodwater progression alongside your evidence board—marking which shortcuts remain above water saves significant backtracking. This mechanic rewards players who treat shortcut mapping as a living document rather than a static checklist.
Safe Puzzle Evidence and Post-Patch Route Access
The safe puzzle evidence, updated in Demo Patch Notes #1, directly ties to a shortcut that bypasses a heavily guarded warehouse. Solving this puzzle correctly grants access to a maintenance tunnel that avoids three scripted enemy spawns. Post-patch, the evidence required for this puzzle was rebalanced, meaning players using pre-patch guides may find the solution outdated. Re-examine the safe's surrounding clues after any game update, as balance adjustments can alter which evidence pieces are valid. This shortcut is particularly valuable for main case progression, as it saves both ammunition and healing resources for later encounters.
Once you understand the basics of shortcut unlocks and evidence board mechanics, you can begin optimizing your entire playthrough around these systems. This advanced section covers strategies that experienced players use to complete main cases with minimal combat and maximum efficiency.
Investigation Order Optimization matters more than most players realize. The order in which you complete optional cases affects which shortcuts become available and when. Because some shortcuts only unlock after you have completed specific story missions, you should plan your optional case completion around your main case progression.
Community testing has established a clear progression order for unlocking shortcuts in The Sinking City 2: prioritize the Canal Street pump station first, as it drains the flooded district and opens the most direct route to the Mariners' Bank evidence board. Following that, target the Wharfside generator to power the tram lines, which cuts traversal time to the Dockside morgue by roughly 40%. Leave the Chapel Hill barricade for last, since its clearance requires the bolt cutter found only after completing the Fisherman's Ledger clue chain; tackling it earlier forces a wasted trip back to the central hub.
-
Complete boat mooring cases first because water travel is the safest early-game option.
-
Prioritize building interior cases in districts where your next main mission takes place.
-
Save ritual investigations for when you have enough insight points to fully explore their evidence boards.
-
Revisit old cases after major story beats because new clues often appear in previously explored areas.
Resource Management becomes critical when you are juggling multiple investigations. Ammunition, health supplies, and insight points all factor into how many cases you can pursue before needing to resupply. The game's optional investigation system rewards alternate solutions and puzzle-solving options, which means you can often complete cases without combat if you have the right clues.
| Resource | Primary Source | Shortcut Impact |
|---|---|---|
| Ammunition | Supply caches, enemy drops | Less needed with safe routes |
| Health supplies | Medical stations, loot | Preserved by avoiding combat |
| Insight points | Environmental examination | Powers evidence board deductions |
| Boat fuel | Dock purchases | Required for water travel |
Flood Timing Exploitation is an advanced technique that involves deliberately timing your investigations around flood cycles. Because floodwaters dynamically alter locations, some shortcuts only become accessible at specific water levels. A basement passage that is underwater at noon may be dry and traversable at dawn, allowing you to access clue locations that would otherwise require swimming through contaminated water.
Players who master this timing report that they can access approximately 30% more clue locations per district than players who explore randomly. This advantage compounds over the course of a playthrough because each additional clue location reveals new evidence board connections, which in turn unlock more shortcuts.
Combat Avoidance remains the core philosophy behind shortcut mastery. Every enemy encounter you avoid preserves resources for the encounters you cannot avoid, such as boss fights and scripted ambushes. The game's combat system is punishing, especially on higher difficulties, so route knowledge directly translates to survival.
Frequently Asked Questions
What is the fastest way to unlock shortcuts in The Sinking City 2?
Complete optional investigations that match your current district, because each optional case typically unlocks a permanent route in the area where it takes place. Prioritize boat mooring cases early, then building interiors, and save ritual investigations for when you have enough insight points to fully explore their evidence boards.
How does the evidence board help with main case progression?
The evidence board lets you connect clues from different investigations, revealing new clue locations and shortcut opportunities. Drawing connections costs insight points, so spend them wisely on links that advance your active story investigation. Revisiting old cases with new clues often unlocks additional evidence board connections that were previously invisible.
Do optional cases ever block main story progress?
No, optional cases never gate main story progress according to the official Steam page. However, they unlock safer routes, hard supplies, and upgrades that make main case progression significantly easier. Players who skip optional cases will complete the story but face more combat encounters and fewer navigation options.
Where are the best clue locations for shortcut unlocks?
High-yield clue zones include abandoned offices for journals, flooded basements for safe puzzles, church interiors for ritual residues, and dock warehouses for boat-related clues. Each zone type corresponds to a specific shortcut type, so focus on the zone that matches the shortcut you want to unlock.
How do floodwaters affect shortcut accessibility?
Floodwaters dynamically alter shortcut accessibility, so a basement passage dry at dawn may be submerged by noon. Optional cases unlock safer routes that stay above the rising tide, letting you bypass contaminated-water swims. Plan investigations around flood cycles to reach clue locations without wasting resources on alternate paths.